Recently, I received an inquiry on WhatsApp from a European client:
Hello
I need vacum bag for lamination eva
The new model u shape
Do you have the low spill easy clean version
The drawing and sample photo he shared were as follows:
It was clear they were asking about U-seal silicone vacuum bags. Together, we explored a variety of common topics surrounding these “U-shaped” bags, including their configurations, features, and benefits.
I realized it’s time to create a comprehensive overview of U-seal bags. For someone like me, who isn’t naturally inclined to storytelling, this feels like both a challenge and an opportunity.
If you happen to have similar questions, I hope today’s reading journey will deliver the answers you’re seeking.
Understanding the Four Key Components of U-Seal Bags
What Are U-Seal Silicone Vacuum Bags?
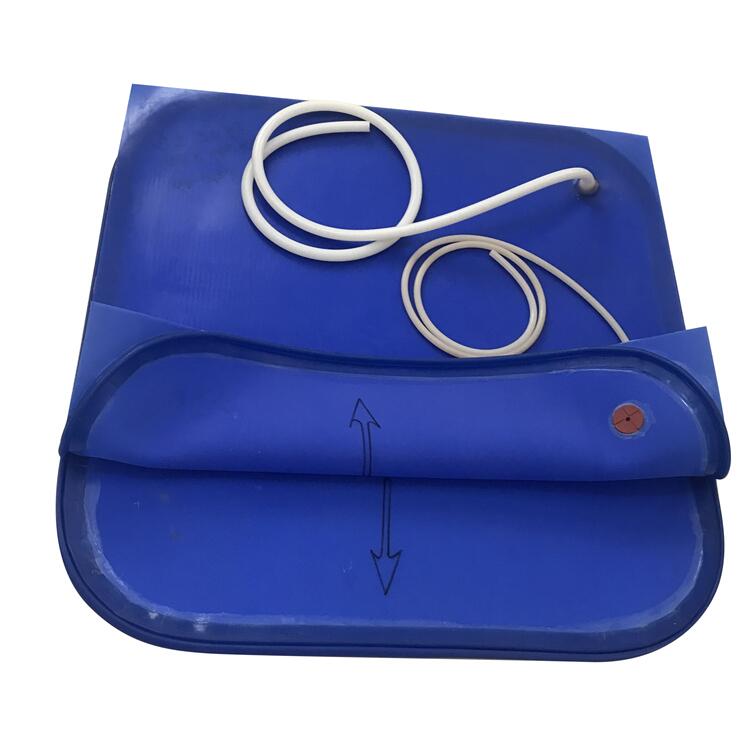
U-Seal silicone vacuum bags are specialized tools used in the glass lamination process, featuring a distinctive U-shaped sealing mechanism. This design includes a male and female seal that interlock securely, creating an airtight vacuum environment. U-Seal bags are particularly valued for their ease of use in simpler lamination projects, such as thin or single-layered glass. Known for their durability, heat resistance, and adaptability, they provide consistent and reliable performance across a range of lamination applications.
1. Top Layer with Female (U-Seal)
The top layer is equipped with the female U-shaped seal, forming one half of the interlocking system.
- Material: High-quality, heat-resistant silicone rubber.
- Role: Acts as the primary sealing surface, mating with the male seal to ensure an airtight closure.
- Features: Distributes pressure evenly and prevents air leakage during the vacuum process.
- Customization: Can be tailored to specific dimensions and configurations to meet client requirements.
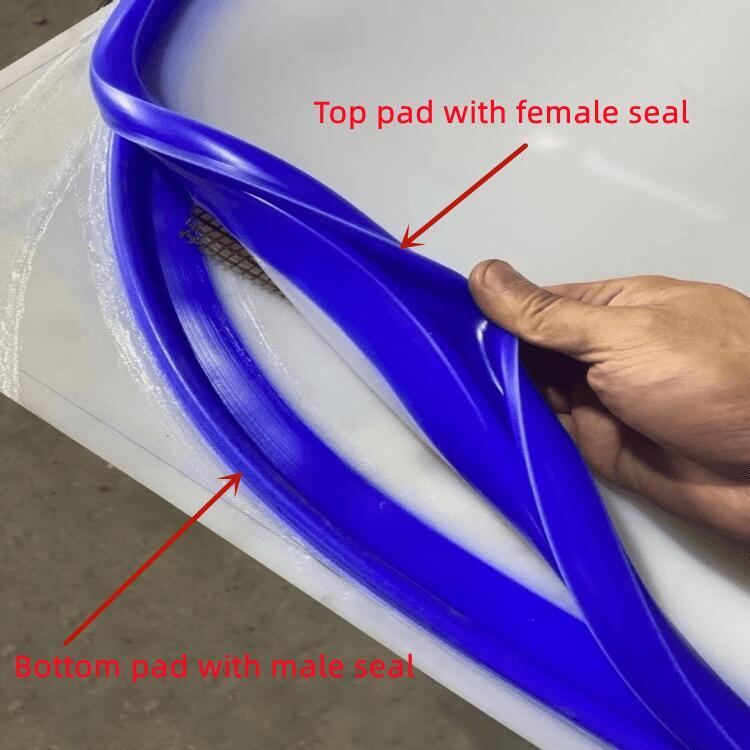
2. Bottom Layer with Male (U-Seal)
The bottom layer houses the male U-shaped seal, which complements the female seal.
- Material: Durable silicone rubber designed for high temperatures and repeated use.
- Role: Interlocks securely with the female seal, providing a tight and stable fit.
- Design Advantage: Offers structural support and stability during lamination, ensuring consistent performance over multiple cycles.
3. Vacuum Nozzles
Vacuum nozzles are integral for air evacuation from the bag.
- Material: Made from silicone or aluminum, based on the application’s needs.
- Positioning: Strategically placed near the bag’s edge or at specific locations for optimal air extraction.
- Function: Connects to the vacuum pump to create a controlled vacuum, ensuring uniform adhesion between glass layers and interlayer materials.
- Customization Options: Number and placement can be adjusted to suit specific lamination requirements.
4. Vacuum Tubes
Vacuum tubes connect the vacuum nozzles to the pump, facilitating efficient air removal.
- Material: Made from durable and flexible materials such as silicone or reinforced plastics.
- Diameter Options: Offered in various sizes to meet different vacuum demands.
- Role: Ensures consistent vacuum performance by efficiently removing air pockets and maintaining an airtight seal.
- Maintenance Tip: Regularly inspect tubes for wear and tear to sustain optimal performance.
Achieving a perfect seal between the top and bottom layers of U-Seal bags requires exceptional skill and attention to detail. Our experienced craftsmen, with over a decade of expertise, meticulously align and secure the layers to maximize airtightness, ensuring reliable performance for every application.
A Step-by-Step Guide to Configuring U-Seal Silicone Vacuum Bags
Configuring U-Seal silicone vacuum bags requires attention to detail to ensure they meet your specific lamination needs. Below is a clear step-by-step guide to help you customize your U-Seal bags for optimal performance.
1. Choose the Bag Color
- Blue: The most commonly preferred color.
- White: Available upon request for bulk orders.
2. Determine the External Size
- Width: Measure and specify the width of your largest glass piece, allowing extra space for the seal.
- Length: Measure and specify the required length to ensure full coverage of your glass.
3. Select the Type of Vacuum Nozzle
- Silicone Nozzle: Cost-effective, flexible, and ideal for standard use.
- Metal Nozzle: Durable and suitable for high-intensity applications.
4. Decide the Quantity of Nozzles
- 1 Port: Suitable for smaller or simpler laminations.
- 2 Ports: Offers better airflow for medium-sized projects.
- 4 Ports or More: Ideal for large or multi-layer laminations to ensure uniform vacuum distribution.
5. Position the Nozzle
- On the Top Pad or Bottom Pad: Specify the layer where the nozzle should be installed.
- On the Short Side or Long Side: Choose based on your setup for optimal air extraction.
- On the Diagonal: Provides balanced vacuum distribution for irregularly shaped glass.
- On the Four Corners: Maximizes efficiency for large laminations.
- In the Middle: Works well for small or single-layer laminations.
6. Select the Vacuum Silicone Hose
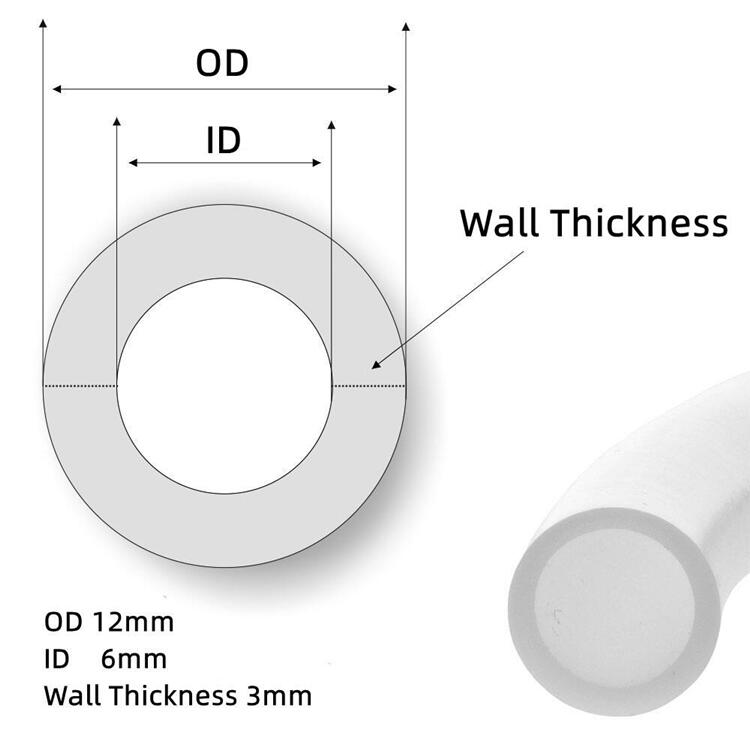
| Hose Size | Inner Diameter (ID) | Outer Diameter (OD) | Use Case |
| Standard Hose | 6mm | 12mm | Suitable for most applications. |
| Medium Hose | 9mm | 17mm | Suitable for medium-sized setups. |
| Large Hose | 10mm | 20mm | Best for large projects requiring fast airflow. |
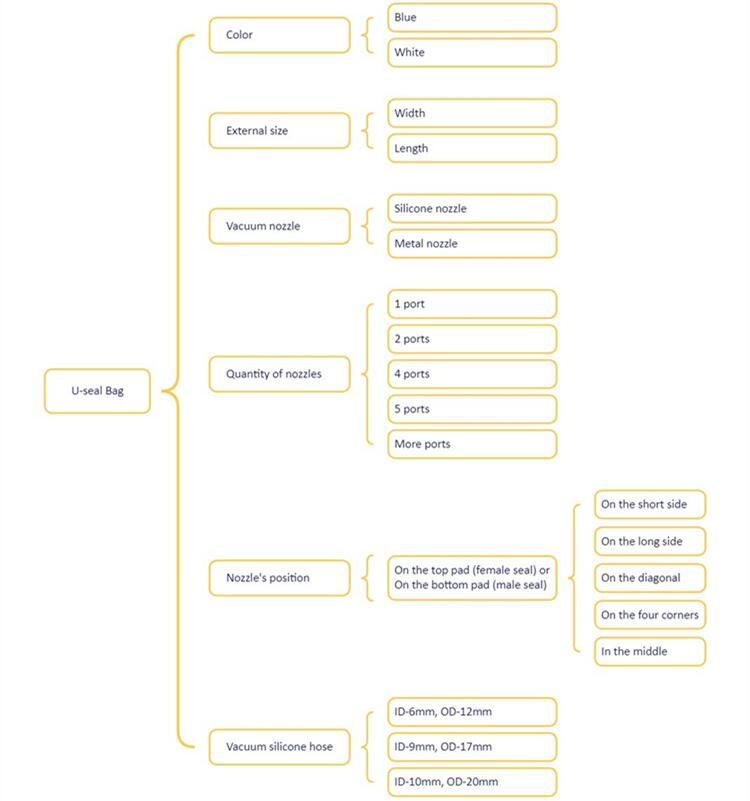
By organizing these key considerations into steps and using a table for clarity, you can easily configure U-Seal silicone vacuum bags to meet your specific needs, ensuring efficiency, reliability, and precision in your glass lamination processes.
The Role of Teflon Mesh in Glass Lamination: What You Need to Know
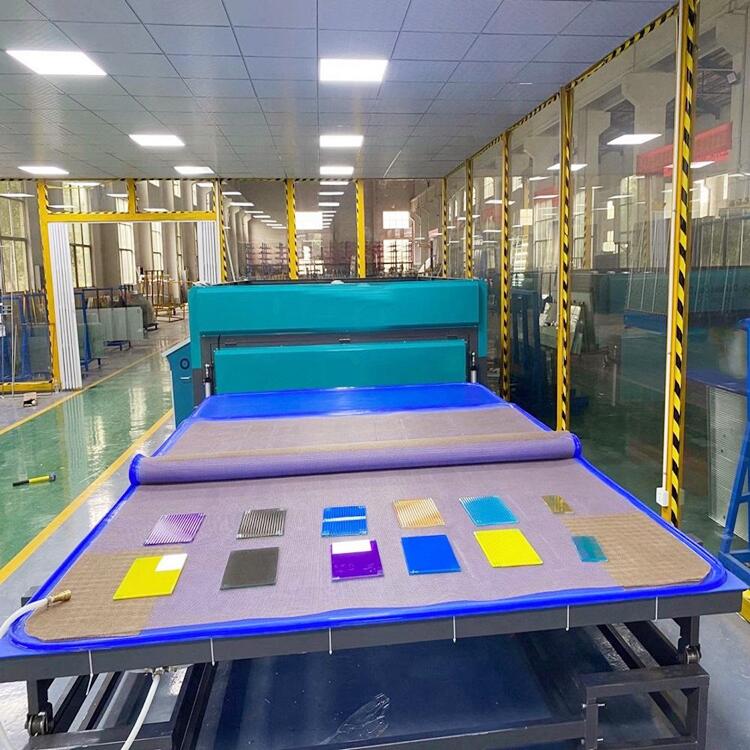
Teflon mesh, also known as PTFE open mesh, plays a crucial role in ensuring high-quality results in glass lamination. It works seamlessly with silicone vacuum bags to enhance efficiency and improve the overall lamination process. Below, we delve into its key characteristics, applications, and benefits.
Why Use Teflon Mesh in Glass Lamination?
- Even Air Distribution: The open structure of the mesh allows air to flow freely, facilitating uniform vacuuming and preventing air pockets that can compromise the adhesion process.
- Protective Layer: Teflon mesh acts as a barrier, shielding the silicone vacuum bag from sharp edges of the glass, reducing the risk of damage.
- Heat Resistance: Highly resistant to extreme temperatures, PTFE mesh maintains its integrity under the intense heat of lamination ovens, making it a reliable tool for repeated use.
Specifications of Teflon Mesh
| Feature | Specification |
| Color | Brown |
| Feature | Double weft |
| Mesh Hole | 4mm × 4mm |
For the technical data sheet, you can also DOWNLOAD here.
How to Use Teflon Mesh Effectively
- Match the Size: The Teflon mesh should be slightly smaller than the vacuum bag’s internal working area to fit snugly without folding or bunching.
- Use Multiple Sheets: Typically, each vacuum bag is paired with two mesh sheets—one for the top and one for the bottom layer of the glass assembly.
Benefits of Teflon Mesh
- Non-Stick Surface: Prevents glass or interlayer materials (EVA or PVB) from sticking to the mesh, ensuring easy separation after the curing process.
- Durability: The double weft structure enhances strength, enabling the mesh to withstand repeated cycles and maintain its shape.
- Enhanced Lamination Quality: By providing a smooth vacuum and protecting the silicone bag, Teflon mesh contributes to a bubble-free, high-quality laminated glass output.
Perfect Companions: Silicone Vacuum Bags and Teflon Mesh
The PTFE open mesh and silicone vacuum bags are designed to complement each other, creating a streamlined lamination process. When used together, they provide:
- Optimal heat distribution.
- Superior protection for vacuum bags.
- Consistent and precise results for laminated glass.
With its unique properties and compatibility, Teflon mesh is an indispensable tool for achieving excellence in glass lamination.
U-Seal vs. E-Seal: Which Is the Right Choice for Your Needs?
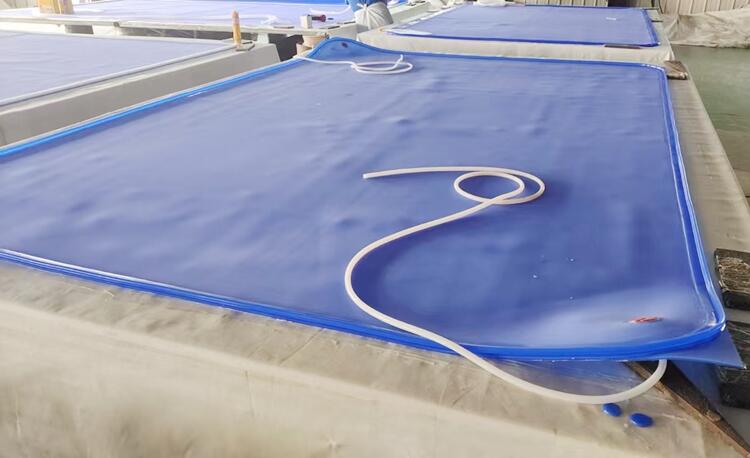
When it comes to choosing between U-seal and E-seal silicone vacuum bags for glass lamination, the decision largely depends on your specific requirements. Both types offer excellent functionality, but their differences and similarities can influence your choice. Let’s explore them in detail.
Similarities Between U-Seal and E-Seal Bags
- Pricing: Both U-seal and E-seal bags are priced the same when ordered in same dimensions. This ensures affordability regardless of the type you choose.
- Manufacturing Process: The production techniques and processes for both bag types are nearly identical. At our factory, skilled workers handle the cutting and bonding for both U-seal and E-seal bags with precision and expertise, ensuring consistent quality.
Differences Between U-Seal and E-Seal Bags
| Feature | U-Seal Bags | E-Seal Bags |
| Sealing Performance | Easier to close, making them suitable for thinner laminated glass or simpler applications. | Superior airtightness, ideal for complex, thicker, or curved laminated glass. |
| Application Feedback | Clients appreciate their ease of operation during setup and closure. | Customers often praise their reliability in maintaining vacuum integrity under demanding conditions. |
Which Should You Choose?
The choice between U-seal and E-seal vacuum bags ultimately depends on your project’s specific needs:
- If you prioritize ease of use and are working with thinner glass or simpler laminations, U-seal bags might be the best fit.
- If you require enhanced sealing performance for multi-layered, curved, or thicker glass, E-seal bags are the recommended option.
Customer Preferences
Based on feedback and data, about 80% of customers prefer E-seal bags, citing their superior sealing capabilities. Meanwhile, 20% opt for U-seal bags, appreciating their operational simplicity.
| Seal Type | Customer Preference (%) |
| E-Seal | 80% |
| U-Seal | 20% |
Both U-seal and E-seal bags have their strengths, and the best choice depends on your unique requirements. If you’re unsure, our team is here to help you assess your needs and find the perfect solution for your glass lamination process.
How to Maintain and Prolong the Life of Your U-Seal Bags
Proper maintenance is critical to ensure the longevity and consistent performance of U-Seal silicone vacuum bags. By following these practical tips, you can maximize their lifespan and efficiency in demanding glass lamination environments.
Regular Cleaning
After each use, clean the bag’s surface with a mild detergent and a soft cloth to remove any debris, interlayer residue, or dust. Avoid using abrasive cleaners or tools that can scratch or damage the silicone material.
Inspect for Damage
Regularly inspect the bag for signs of wear, such as punctures, weak points, or seal damage, particularly along the U-seal edges and nozzle area. Minor tears should be promptly repaired with a silicone-compatible adhesive to maintain vacuum integrity. For significant damage, consider replacing the bag to ensure consistent quality.
Store Carefully
When not in use, store the U-Seal bag in a cool, dry environment, away from direct sunlight and heat sources. UV exposure and extreme temperatures can degrade the silicone over time. Lay the bag flat or roll it loosely to avoid creasing or deforming the material.
Avoid Sharp Objects
During setup and operation, handle the bag with care to prevent contact with sharp edges of the glass or tools. Use protective layers, such as PTFE mesh, to safeguard the bag from potential punctures or tears during the lamination process.
Apply Sealant When Needed
If the U-seal edges or seams begin to show wear, apply a thin layer of silicone-compatible sealant to reinforce the airtight seal. This simple step can significantly extend the bag’s usability and maintain its performance.
Consider Your Laminating Oven
Different laminating ovens may have unique preheating, heating, and cooling cycles depending on the manufacturer. Consult your oven supplier to understand the exact operational settings required. Failing to follow the appropriate temperature and time controls could reduce the bag’s lifespan and negatively impact its performance.
By adopting these maintenance practices, you can ensure that your U-Seal bags provide reliable, long-term performance, saving you costs and enhancing your glass lamination results.
How to Calculate the Actual Weight of a U-Seal Vacuum Bag
While U-Seal bags are slightly lighter than E-Seal bags of the same dimensions due to their simpler sealing edges, the weight calculation process remains consistent. Let’s calculate the weight of a U-Seal vacuum bag with a thickness of 3mm and external dimensions of 2.5M × 3.9M (2500mm x 3900mm) using the correct formula.
Step 1: Determine the Dimensions
| Parameter | Measurement |
| Thickness | 3mm |
| Width | 2.5M |
| Length | 3.9M |
| Layers | 2 (top and bottom silicone sheets) |
Step 2: Calculate the Silicone Sheet Weight
Formula:
Density (1.3g/cm³) × Thickness × Length × Width × 2 Layers
Calculation:
1.3g/cm³ × 3mm × 2.5M × 3.9M × 2 = 76.05kg
Step 3: Add the U-Sealing Strip Weight
Formula:
(Length + Width) × 2 × 2 Layers × 0.4kg/M (U-Seal weight per meter)
Calculation:
(2.5M + 3.9M) × 2 × 2 × 0.4kg/M = 10.24kg
Step 4: Calculate the Total Weight
| Component | Weight |
| Silicone Sheets | 76.05kg |
| Sealing Strips | 10.24kg |
| Total Weight | 86.29kg |
Final Result
The net weight (N.W.) of a U-Seal silicone vacuum bag with 3mm thickness and external dimensions of 2.5M × 3.9M is approximately 86.29kg per set.
This precise calculation provides the exact weight for handling, shipping, and ensuring compatibility with your lamination equipment. For any customizations or further assistance, feel free to contact our team.
Packing Details and Shipment for Vacuum Bags: Best Practices
Proper packing and shipment of U-Seal silicone vacuum bags are essential to ensure they arrive in excellent condition and are ready for immediate use. Below are the key practices we follow for both packaging and transportation:
Packing Guidelines
Folding and Wrapping
 |
- The vacuum bags are carefully folded, taking advantage of silicone’s inherent properties of durability, flexibility, and resilience.
- Each folded bag is then wrapped in a puncture-resistant and abrasion-proof woven bag for added protection.
Outer Packaging Options
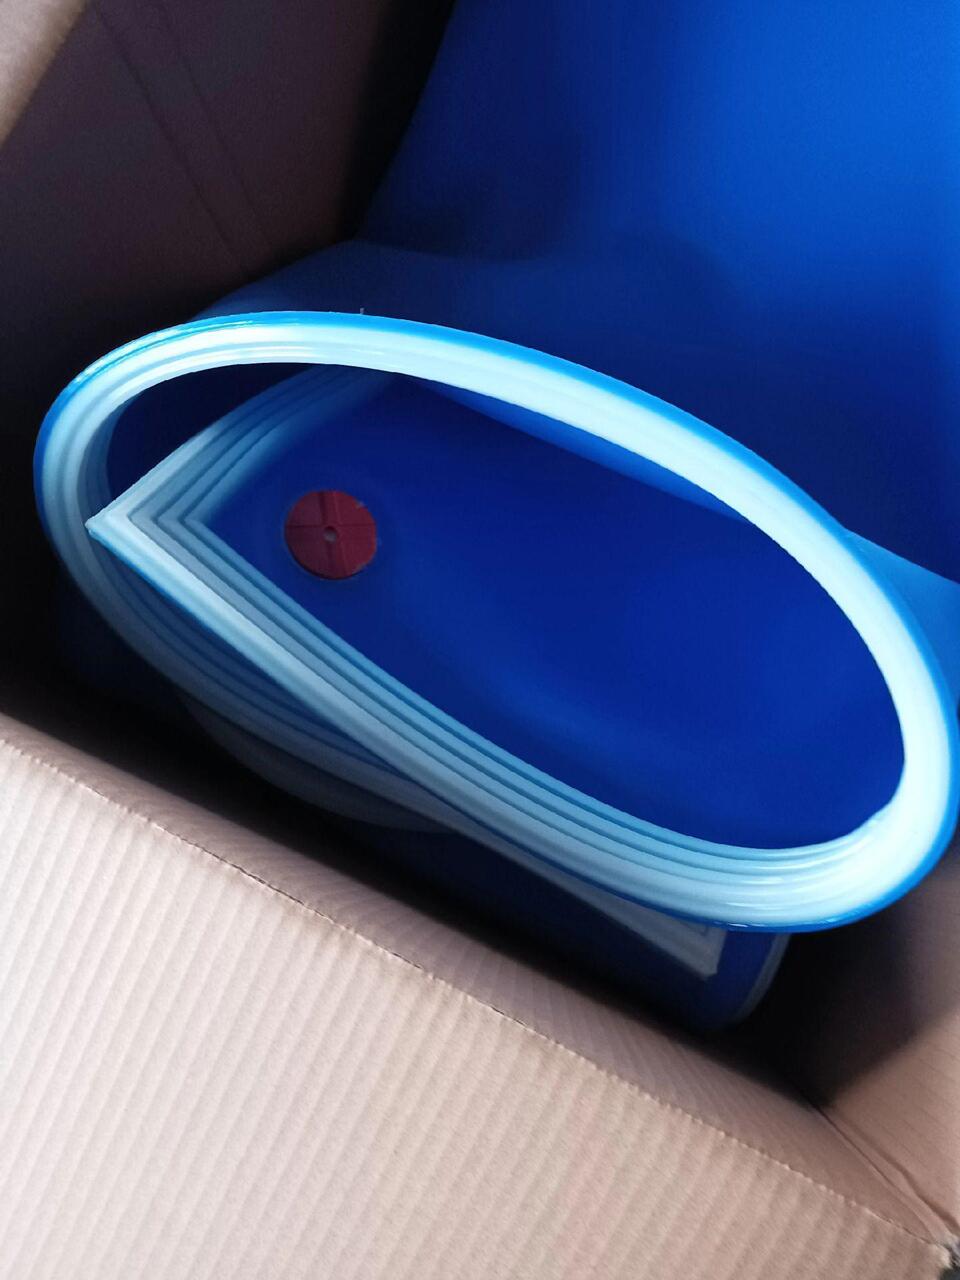 |  |
- For smaller and lighter bags: They are packed in five-layer corrugated boxes, providing sufficient protection during transit.
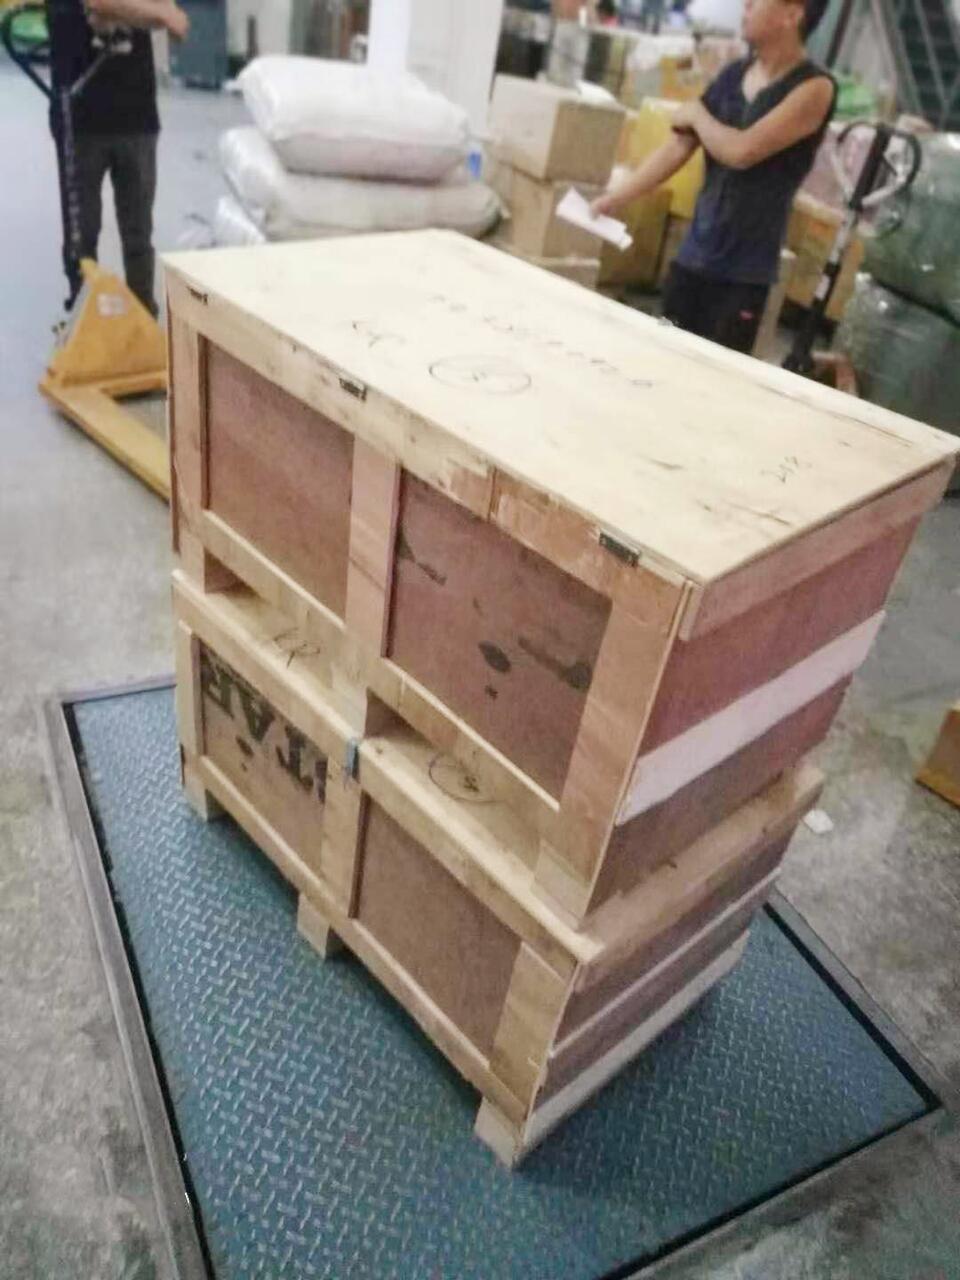
- For larger and heavier bags: These are placed in sturdy wooden crates, ensuring easier handling with forklifts for loading and unloading.
Unwrapping and Handling Instructions
- Upon receipt, end-users are advised to unwrap the parcels immediately and unfold the vacuum bags.
- If possible, bags should be preheated and used promptly to maintain their optimal performance.
Shipment Arrangements
Logistics Support
- For customers without their own freight forwarder, we provide comprehensive shipping services to ensure a seamless delivery process.
- If customers have their own forwarder in China, we work closely with their logistics team to ensure smooth coordination for pickup and shipment.
Customized Solutions
- Depending on the destination and shipment size, we select the most reliable and cost-effective shipping method.
- Necessary documentation is provided to ensure compliance with local customs regulations, minimizing delays during transit.
By adhering to these packing and shipment practices, we guarantee that U-Seal vacuum bags are delivered safely and maintain their quality throughout transportation, ready for immediate use upon arrival.
7 Signs That It’s Time to Replace Your U-Seal Bags
Knowing when to replace your U-Seal silicone vacuum bags is crucial to maintaining optimal lamination performance and preventing costly disruptions. Below are the key indicators that it’s time to invest in a replacement:
1. Frequent Air Leaks
Sign: Difficulty maintaining a consistent vacuum or noticing air bubbles during the lamination process.
Cause: Worn-out sealing edges, punctures, or micro-tears in the silicone material.
Action: Inspect the bag thoroughly and replace it if the airtight seal can no longer be restored.
2. Visible Tears or Punctures
Sign: Small holes, tears, or worn-out areas on the bag’s surface, especially along the edges or near the vacuum nozzles.
Cause: Damage from sharp glass edges, improper handling, or long-term use.
Action: Minor damage may be repaired with silicone-compatible adhesives, but significant tears require a replacement.
3. Degraded Sealing Strips
Sign: Sealing strips lose their elasticity or fail to interlock properly, compromising the vacuum.
Cause: Overuse, excessive heat exposure, or chemical degradation over time.
Action: Replace the bag if sealing strips cannot provide a secure and airtight connection.
4. Uneven Pressure Distribution
Sign: Laminated glass exhibits imperfections such as uneven bonding or visible bubbles.
Cause: Loss of silicone flexibility or surface integrity, leading to inconsistent pressure distribution.
Action: A new bag is necessary to ensure consistent results, particularly for high-precision laminations.
5. Discoloration or Brittleness
Sign: The silicone material becomes discolored, brittle, or excessively stiff.
Cause: Prolonged exposure to high temperatures, UV light, or harsh chemicals.
Action: Replace the bag, as these signs indicate a decline in material performance.
6. Increased Production Downtime
Sign: Frequent adjustments or repairs to maintain vacuum performance, leading to reduced production efficiency.
Cause: Aging bag components that can no longer meet operational demands.
Action: Investing in a new bag reduces downtime and enhances workflow efficiency.
7. Manufacturer’s Lifecycle Recommendation
Sign: The bag has exceeded its expected lifecycle, as indicated by the manufacturer’s guidelines.
Cause: Normal wear and tear from prolonged use.
Action: Periodic replacements, even in the absence of visible damage, help maintain consistent quality.
By recognizing these signs early, you can plan timely replacements for your U-Seal vacuum bags, ensuring uninterrupted production and top-notch lamination quality. Always consult your supplier for guidance on selecting the right replacement bag tailored to your specific needs.
Frequently Asked Questions About U-Seal Silicone Vacuum Bags
Here are answers to some common queries about U-seal silicone vacuum bags to help you make informed decisions.
Is your vacuum silicone bag able to be used in the Autoclave?
Yes, but rarely. Typically, autoclave systems use silicone blankets rather than vacuum bags, which are more suited for cost-effective EVA laminated glass ovens.
Are your vacuum bags available in standard sizes, or are they custom-made?
All our silicone vacuum bags are custom-made to fit your specific requirements. We do not stock standard sizes or pre-made bags. This ensures the dimensions, thickness, and features align perfectly with your equipment and lamination needs. Just share your glass size or production details, and we’ll handle the rest.
How long will the bag last with regular use?
The lifespan depends on factors like machine type, operator skill, working temperature, and usage conditions. While we can’t specify an exact number of cycles, proper care—such as cleaning, careful handling, and avoiding sharp edges—can significantly extend durability. Need maintenance tips? Contact us!
Can I get a sample or a smaller bag for testing?
Absolutely. We offer sample bags in smaller sizes (e.g., 500mm x 500mm) or customized to your dimensions. These samples allow you to test the bag’s compatibility and performance before committing to a larger order.
What should I do if my bag gets punctured or damaged?
Minor punctures or tears can be repaired using silicone-compatible adhesives or sealants. For significant damage, we recommend replacing the bag to maintain consistent lamination quality. Our team is happy to provide repair guidance or replacement options.
What is the lead time for custom orders?
Custom orders typically take 7 to 15 days to manufacture, depending on the bag’s size and complexity. Shipping times vary based on location. We ensure clear communication and timely delivery for all orders.
Have more questions?
If your inquiry isn’t covered here, feel free to reach out to us. Our team is always ready to assist, and we continuously update this section with new questions to provide the most comprehensive support.
Conclusion
After exploring this comprehensive guide, you’re now equipped with a solid understanding of U-Seal silicone vacuum bags, from their components and configuration to maintenance tips and real-world applications.
Here’s a quick challenge for you:
Can you calculate the weight of a U-Seal vacuum bag with external dimensions of 3mm x 1700mm x 3100mm? Take a moment to work it out!
If you need a hint, refer to the step-by-step calculation process outlined earlier. Once you’ve solved it, click [HERE] to verify your answer.
Still wondering whether U-Seal bags are the right choice for your lamination needs? Or do you need guidance on choosing between U-Seal and E-Seal designs? Leave us a message, and our team will be happy to assist with personalized recommendations based on your specific requirements.
The journey doesn’t end here. Whether you’re configuring your first bag, looking for advanced solutions, or simply exploring options, we’re excited to be part of your glass lamination success story. Let’s make it happen!


